Self-host Vaultwarden
A Bitwarden-compatible password manager for you and your team.
Shelley handles the setup. About 15 minutes.
Prefer a terminal?
curl -fsSL https://exe-staging.dev/deploy/vaultwarden/prompt.txt | ssh exe.dev new --prompt=/dev/stdinVaultwarden is a small, open-source server for the Bitwarden password manager. Bitwarden's browser extensions, phone apps, desktop app and CLI connect to it as they would to Bitwarden's own cloud: shared team vaults, file attachments, Sends, two-step login, all on a disk you control.
On an exe.dev VM it gets a real, persistent disk and HTTPS with no setup. Only the vault itself faces the internet: the admin panel stays on a private port behind your exe.dev login, and if every device can run Tailscale, the vault can stay off the internet too. Shelley sets it up, and can take the backups and updates off your hands later.
Warning
A password manager is the most valuable thing you can host. Your vault is encrypted on your devices before it's sent, so the server never sees your passwords, but a public server can still be attacked, and you are its security team. Use a VM for nothing else, turn on two-step login, update promptly, and keep backups off the VM.
What you get#
- Vaultwarden running with signups closed, ready for you to invite yourself.
- The admin panel on a private port behind exe.dev login, with an Argon2-hashed admin password.
- A public front door for Bitwarden apps that refuses /admin and keeps live sync working.
- Nightly backups of the database, attachments and keys, with one checked in a scratch copy.
- Everything starts again after a reboot.
What's running, and where
https://my-vaultwarden.exe.xyz/
The vault, for Bitwarden apps and the web vault, once you choose to open it
https://my-vaultwarden.exe.xyz:8080/admin
The admin panel, behind exe.dev login and the admin password
Deploy with Shelley#
Click Deploy and Shelley will set up Vaultwarden on a new VM, then check that it works. No config-file wrangling required.
Prefer a terminal?
curl -fsSL \
  https://exe-staging.dev/deploy/vaultwarden/prompt.txt \
  | ssh exe.dev new --prompt=/dev/stdin
What Shelley is told
Set up Vaultwarden on this VM by following the exe.dev recipe at https://exe-staging.dev/deploy/vaultwarden.md?via=deploy from top to bottom.

The recipe's example VM name is my-vaultwarden. This VM's name is the output of `hostname`: use it wherever the recipe writes my-vaultwarden. Skip the step that creates the VM; you are on it.

You are done when all of these are true. Check each one yourself:
- Vaultwarden running with signups closed, ready for you to invite yourself.
- The admin panel on a private port behind exe.dev login, with an Argon2-hashed admin password.
- A public front door for Bitwarden apps that refuses /admin and keeps live sync working.
- Nightly backups of the database, attachments and keys, with one checked in a scratch copy.
- Everything starts again after a reboot.

Read the whole recipe, including the closed details. For initial setup,
follow "Install by hand" first, skipping VM creation and SSH: Docker and
argon2, the admin password and settings, the Compose stack, nginx, the
backup timer, and the backup test. The walkthrough at the top is for the
owner afterwards.
Work as exedev in ~/vaultwarden. Never overwrite an existing
vaultwarden.env or admin-password. Don't create Vaultwarden accounts,
invite anyone, set up SMTP or Tailscale, or change DOMAIN. Don't run
Restore or Update. You can't make the VM public from the VM; leave that
to the owner, and don't ask them to until you're done.
Verify docker.service is enabled, the container uses unless-stopped,
/alive answers on localhost:8000 and localhost:8080, /admin returns 404
on localhost:8000 and 200 on localhost:8080, the backup timer is enabled
and the backup test passes. Do not reboot.
Never paste the admin password into the chat; say it's in
~/vaultwarden/admin-password. Finish by pointing the owner to "Choose
who can reach it" and "Make your account".

Finish with the URLs I should open.
Also at /deploy/vaultwarden/prompt.txt. The recipe it follows is /deploy/vaultwarden.md.
Choose who can reach it#
Bitwarden apps talk to the server directly, and they can't sign in to exe.dev first. So the vault either faces the internet, or it's reachable only over a private network:
- Public, hardened (this guide's default). The vault is at
https://my-vaultwarden.exe.xyz/for anyone to reach, but signups are closed, logins are rate-limited per client, and/adminisn't served there at all. Any device works, no VPN needed. Pick this for a family or team with phones and laptops you don't manage. - Private, over Tailscale. The vault is reachable only from devices on your Tailscale network, so nobody else can even try. Every device needs Tailscale switched on to sync. Pick this if your devices already run Tailscale, or if "on the internet" is a deal-breaker. Follow Private with Tailscale instead of the next step.
Either way, the admin panel at https://my-vaultwarden.exe.xyz:8080/admin
is behind exe.dev login, and only people you share the VM with can even
see its password prompt.
Open the vault#
On your computer, make the VM's main port public:
ssh exe.dev share set-public my-vaultwarden
Open https://my-vaultwarden.exe.xyz/ in a private window: you should get
Vaultwarden's sign-in page, not exe.dev's. Signups are closed, so nobody can
make an account until you invite them. ssh exe.dev share set-private my-vaultwarden closes it again.
Make your account#
The admin panel invites people. Get its password; on your computer:
ssh my-vaultwarden.exe.xyz cat vaultwarden/admin-password
- Open
https://my-vaultwarden.exe.xyz:8080/admin(sign in to exe.dev if asked) and paste the password. - In Users, enter your email under Invite User and click Invite.
- Open
https://my-vaultwarden.exe.xyz/, click Create account, and use the same email. Choose a long master password.
The master password can't be recovered or reset, by you or anyone else:
write it down somewhere safe. Then store the admin password in your new
vault and, if you like, delete ~/vaultwarden/admin-password from the VM.
Vaultwarden only keeps a hash of it.
Now turn on two-step login: in Settings → Security → Two-step login, click Manage next to Authenticator app. Then click View recovery code and keep the code with your master password.
Connect your apps#
In any Bitwarden app (browser extension, iOS, Android, desktop), open the
server menu on the login screen (labeled Logging in on or
Accessing, and set to bitwarden.com), choose Self-hosted, and enter
https://my-vaultwarden.exe.xyz as the Server URL. Then log in with
your email and master password.
The Bitwarden CLI works the same way:
bw config server https://my-vaultwarden.exe.xyz
bw login you@example.com
bw sync
bw list items --search github
Changes sync live: the web vault and desktop apps keep a WebSocket open through exe.dev's proxy, so an item saved in one shows up in the other within seconds. Phone apps sync when you open them or pull to refresh.
Bring your team#
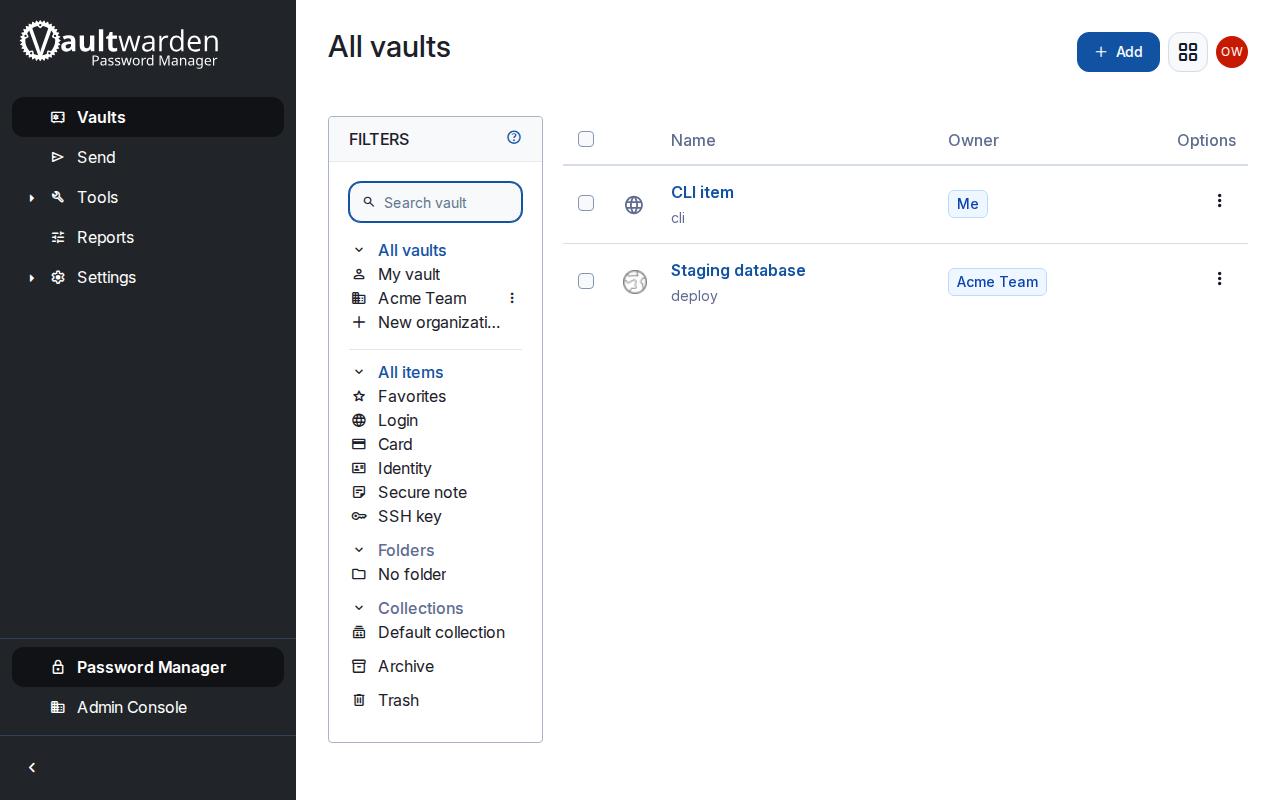
Shared passwords live in an organization. In the web vault, click New organization, name it, and you're its owner. It starts with a Default collection; add collections for each group of secrets.
To add a teammate:
- In the organization's Members, click Invite member and enter their email. Under More settings, add the collections they may see.
- Tell them to open
https://my-vaultwarden.exe.xyz/, click Create account with that email, and set their own master password. (Without email, nobody gets an invitation message; the invite just lets that address sign up.) - Back in Members, they show under Needs confirmation. Choose Confirm from the menu on their row. Only then can they decrypt the shared items.
Removing someone from the organization takes away future access, but they may have copied what they could already see: change shared passwords when someone leaves.
Note
Teammates don't need the exe.dev VM shared with them; the vault is public. Sharing the VM (
ssh exe.dev share add) only lets them reach the admin panel's password prompt, so don't, unless they help run the server.
Lock it down#
The install already closes signups, hashes the admin password with
Argon2, keeps /admin off the public port, turns off password hints and
rate-limits logins by each client's own address (about ten quick tries,
then one a minute). The rest is up to you:
- Two-step login for everyone. In the organization's Admin Console → Settings → Policies, turn on Require two-step login. Owners and admins are exempt; other members without it are revoked until they turn it on and you restore them in Members.
- Who can make organizations. Anyone with an account can. To allow only
you, add
ORG_CREATION_USERS=you@example.comto~/vaultwarden/vaultwarden.envand rundocker compose up -din~/vaultwarden. - Prefer the apps. Browser extensions and phone apps ship their own code; the web vault's code comes from your server each time you load it. Use the web vault for admin chores, not as your daily client.
- One job per VM. Anyone with a shell on this VM, including agents
running there, could tamper with the server. Don't run other apps on it,
and don't share it with
--root. - Update promptly. Vaultwarden ships security fixes often (two releases in October and November 2026 alone). Watch its releases and follow Update.
- The admin panel is a second front door. Settings saved there go into
~/vaultwarden/data/config.jsonand overridevaultwarden.env. To turn the panel off entirely, remove theADMIN_TOKENline fromvaultwarden.envand rundocker compose up -d.
Keep your vault safe#
Everything lives in ~/vaultwarden/data: the SQLite database, attachments,
Sends, and the key that signs login sessions. Every night a timer saves a
consistent copy of all of it, plus your settings, to
~/vaultwarden/backups and keeps two weeks.
A backup on the same disk doesn't survive losing the VM. Copy them off regularly; on your computer:
rsync -a my-vaultwarden.exe.xyz:vaultwarden/backups/ ./vaultwarden-backups/
The vault items inside are still encrypted with your users' master passwords, but the files also hold the admin password's hash and any SMTP password: keep them private. For whole-disk copies in your own S3 bucket, see exe.dev's VM backups.
Also export your vault now and then: Tools → Export, format .json (Encrypted), Password protected. That file imports into any Bitwarden-compatible server, even if this one is gone.
To restore, or to check that a backup restores, see Back up and restore, or ask Shelley.
Email (optional)#
Vaultwarden sends email over SMTP: invitations, email verification,
email as a two-step login method, and new-device alerts. exe.dev's
email gateway is an HTTP API that only mails you and
your team, so it can't stand in; use a transactional email service's SMTP
settings. Add them to ~/vaultwarden/vaultwarden.env on the VM:
SMTP_HOST=smtp.example.com
SMTP_PORT=587
SMTP_SECURITY=starttls
SMTP_FROM=vault@example.com
SMTP_USERNAME=your-smtp-user
SMTP_PASSWORD=your-smtp-password
Then cd ~/vaultwarden && docker compose up -d, and use SMTP Email
Settings → Send test email in the admin panel. With email on, invited
teammates must accept the emailed invitation before they can join.
Private with Tailscale#
This keeps the vault off the internet: Bitwarden apps reach it only from
devices signed in to your Tailscale network, at a ts.net address with
Tailscale's own HTTPS certificate. Do this instead of
Open the vault. If you already opened it, close it on
your computer with ssh exe.dev share set-private my-vaultwarden.
In the Tailscale admin console,
turn on MagicDNS and HTTPS Certificates. Then, on the VM, join your
network (Tailscale is preinstalled) and open the login URL it prints. To
join without a login link or an auth key on the VM, use exe.dev's
Tailscale integration instead of
tailscale up.
sudo systemctl enable --now tailscaled
sudo tailscale up --hostname=$(hostname)
Serve the vault (nginx's port, so /admin stays out) over HTTPS on your
tailnet, and tell Vaultwarden its new address:
sudo tailscale serve --bg 8000
TS_NAME=$(tailscale status --json | jq -r '.Self.DNSName | rtrimstr(".")')
sed -i "s|^DOMAIN=.*|DOMAIN=https://$TS_NAME|" ~/vaultwarden/vaultwarden.env
cd ~/vaultwarden && docker compose up -d
echo "https://$TS_NAME"
Use the printed address as the Server URL in your apps, and in
Make your account in place of the exe.xyz one. The
admin panel stays at https://my-vaultwarden.exe.xyz:8080/admin. Phones
need the Tailscale app connected to sync; they still unlock their offline
copy without it.
Use your own domain#
To serve the vault at, say, vault.example.com, point a CNAME at
my-vaultwarden.exe.xyz and register it, on your computer, as described in
custom domains:
ssh exe.dev domain add my-vaultwarden vault.example.com
Then set DOMAIN=https://vault.example.com in
~/vaultwarden/vaultwarden.env and run docker compose up -d in
~/vaultwarden. Change it before you register security keys or passkeys
for two-step login: they're bound to the domain, and stop working when it
changes. Update the Server URL in every app.
The nuts and bolts#
Happy clicking Deploy? You can stop here. These are the same setup steps Shelley follows, plus the maintenance commands for later. Tested with Vaultwarden 1.37.5 (web vault 2026.10.1) and Bitwarden CLI 2026.10.1.
Install by hand
Create a VM#
On your computer (pick another name if my-vaultwarden is taken):
ssh exe.dev new --name=my-vaultwarden
ssh my-vaultwarden.exe.xyz
All remaining installation commands run on the VM, as exedev. They
use hostname, so your VM can have any name.
Get Docker ready#
Enable Docker at boot, or exe.dev's on-demand Docker won't restart
Vaultwarden after a reboot. argon2 hashes the admin password.
sudo systemctl enable --now docker.service
sudo apt-get install -y argon2
systemctl is-enabled docker.service
Expect enabled.
Make the admin password#
This makes a random admin password, saves it to
~/vaultwarden/admin-password, and gives Vaultwarden only its Argon2 hash
(with the parameters Vaultwarden's own vaultwarden hash uses). The
settings file is readable only by you. It won't overwrite an existing one.
mkdir -p ~/vaultwarden/backups && cd ~/vaultwarden
if [ ! -f vaultwarden.env ]; then
  (
    umask 077
    openssl rand -base64 30 > admin-password
    HASH=$(tr -d '\n' < admin-password | argon2 "$(openssl rand -base64 32)" -e -id -k 65540 -t 3 -p 4)
    cat > vaultwarden.env <<EOF
DOMAIN=https://$(hostname).exe.xyz
ADMIN_TOKEN='$HASH'
EOF
  )
fi
ls -l admin-password vaultwarden.env
grep -c 'argon2id' vaultwarden.env
Expect both files with -rw-------, and 1. The single quotes around the
hash matter: they stop its $ signs from being read as variables.
Start Vaultwarden#
The image tag is pinned; Update moves it. Port 8080 is Vaultwarden itself, which exe.dev's proxy only serves behind your login.
cat > ~/vaultwarden/compose.yaml <<'EOF'
services:
  vaultwarden:
    image: vaultwarden/server:1.37.5
    container_name: vaultwarden
    restart: unless-stopped
    env_file: vaultwarden.env
    environment:
      SIGNUPS_ALLOWED: "false"
      INVITATIONS_ALLOWED: "true"
      PASSWORD_HINTS_ALLOWED: "false"
      # exe.dev's proxy appends the client's address; rate limits use it.
      IP_HEADER: X-Forwarded-For
    volumes:
      - ./data:/data
    ports:
      - "8080:80"
EOF
cd ~/vaultwarden
docker compose up -d
until curl -fs localhost:8080/alive; do sleep 2; done; echo
docker compose logs | grep -E 'Version|launched'
Expect a timestamp in quotes, then Version 1.37.5 and Rocket has launched.
Put nginx in front#
nginx answers on port 8000, the port share set-public publishes. It
passes everything to Vaultwarden except /admin, including the WebSocket
for live sync and uploads up to Vaultwarden's 525 MB limit, and passes on
the client address exe.dev's proxy sends.
sudo tee /etc/nginx/sites-available/vaultwarden >/dev/null <<'EOF'
# exe.dev's proxy -> nginx :8000 (the port you can make public) -> Vaultwarden :8080.
# The admin panel is not served here; it's on the private port 8080.

map $http_upgrade $connection_upgrade {
    default upgrade;
    ''      '';
}

server {
    listen 8000 default_server;
    listen [::]:8000 default_server;
    server_name _;
    client_max_body_size 525m;

    location ^~ /admin {
        return 404;
    }

    location / {
        proxy_pass http://127.0.0.1:8080;
        proxy_http_version 1.1;
        proxy_set_header Upgrade $http_upgrade;
        proxy_set_header Connection $connection_upgrade;
        proxy_set_header Host $http_host;
        proxy_set_header X-Forwarded-Proto $http_x_forwarded_proto;
        proxy_set_header X-Forwarded-For $http_x_forwarded_for;
        proxy_read_timeout 1h;
    }
}
EOF
sudo rm -f /etc/nginx/sites-enabled/default
sudo ln -sf /etc/nginx/sites-available/vaultwarden /etc/nginx/sites-enabled/vaultwarden
sudo nginx -t
sudo systemctl enable --now nginx
sudo systemctl reload nginx
for u in localhost:8000/alive localhost:8000/admin localhost:8080/admin; do
  echo "$u $(curl -s -o /dev/null -w '%{http_code}' $u)"
done
Expect test is successful, then 200, 404 and 200: the vault is
on port 8000, the admin panel only on 8080.
Set up nightly backups#
The backup uses SQLite's online backup, so Vaultwarden keeps running. It
runs as root because the container writes data as root.
cat > ~/vaultwarden/backup.sh <<'EOF'
#!/bin/bash
# Back up Vaultwarden: a consistent copy of the SQLite database, plus
# attachments, Sends, the session signing key, config.json, and the
# Compose and settings files. Run with sudo.
set -euo pipefail
cd /home/exedev/vaultwarden
stamp=$(date -u +%Y%m%d-%H%M%S)
work=$(mktemp -d)
trap 'rm -rf "$work"' EXIT
mkdir "$work/data"
sqlite3 data/db.sqlite3 ".backup '$work/data/db.sqlite3'"
[ "$(sqlite3 "$work/data/db.sqlite3" 'PRAGMA integrity_check')" = ok ]
for f in attachments sends config.json rsa_key.pem; do
  if [ -e "data/$f" ]; then cp -a "data/$f" "$work/data/"; fi
done
cp -a compose.yaml vaultwarden.env "$work/"
umask 077
tar -C "$work" -czf "backups/vaultwarden-$stamp.tar.gz" data compose.yaml vaultwarden.env
chown exedev: "backups/vaultwarden-$stamp.tar.gz"
find backups -name 'vaultwarden-*.tar.gz' -mtime +13 -delete
echo "backups/vaultwarden-$stamp.tar.gz"
EOF
chmod 755 ~/vaultwarden/backup.sh
Schedule it for 03:30 UTC (or so), then take a first backup:
sudo tee /etc/systemd/system/vaultwarden-backup.service >/dev/null <<'EOF'
[Unit]
Description=Back up Vaultwarden

[Service]
Type=oneshot
ExecStart=/home/exedev/vaultwarden/backup.sh
EOF
sudo tee /etc/systemd/system/vaultwarden-backup.timer >/dev/null <<'EOF'
[Unit]
Description=Back up Vaultwarden every night

[Timer]
OnCalendar=*-*-* 03:30:00
RandomizedDelaySec=30m
Persistent=true

[Install]
WantedBy=timers.target
EOF
sudo systemctl daemon-reload
sudo systemctl enable --now vaultwarden-backup.timer
sudo systemctl start vaultwarden-backup.service
systemctl list-timers vaultwarden-backup.timer
ls -l ~/vaultwarden/backups
Check that the timer has a next run and there's a vaultwarden-*.tar.gz
readable only by you. For failures: journalctl -u vaultwarden-backup.
Test a backup#
Unpack the newest backup into a scratch directory, count what's in its database, and start a throwaway Vaultwarden on it, without touching the running one:
latest=$(ls -1t ~/vaultwarden/backups/vaultwarden-*.tar.gz | head -n 1)
mkdir /tmp/vw-restore-test
tar -C /tmp/vw-restore-test -xzf "$latest"
sqlite3 /tmp/vw-restore-test/data/db.sqlite3 \
  "SELECT count(*) || ' users' FROM users; SELECT count(*) || ' items' FROM ciphers;"
docker run -d --rm --name vw-restore-test -v /tmp/vw-restore-test/data:/data \
  -p 127.0.0.1:8099:80 vaultwarden/server:1.37.5
until curl -fs localhost:8099/alive; do sleep 2; done; echo
docker stop vw-restore-test
sudo rm -rf /tmp/vw-restore-test
Expect counts (0 users and 0 items on a new install), then a
timestamp from the scratch copy.
Installation done. Leave the sharing choice to the owner; continue with Choose who can reach it.
Back up and restore
On the VM, sudo ~/vaultwarden/backup.sh makes an extra backup and prints
its path. Copy backups off the VM as in
Keep your vault safe.
Restore#
This replaces the vault with the backup: anything saved since is lost. Bitwarden apps keep working, since the session key comes back too. Use your backup's actual filename below.
On the same VM, stop Vaultwarden, keep the current data aside, and unpack
only the backup's data:
cd ~/vaultwarden
sudo ./backup.sh
docker compose down
sudo mv data "data.before-restore-$(date -u +%Y%m%d-%H%M%S)"
sudo tar -C ~/vaultwarden -xzf backups/vaultwarden-20261118-033012.tar.gz data
docker compose up -d
until curl -fs localhost:8080/alive; do sleep 2; done; echo
Run bw sync or open an app to check your items are there. Keep the
data.before-restore-* directory until you're sure.
On a new VM, follow Get Docker ready, then copy the backup over; on your computer:
scp vaultwarden-20261118-033012.tar.gz my-vaultwarden.exe.xyz:
On the VM, unpack all of it, settings included. If the VM's name changed,
the sed points DOMAIN at the new exe.xyz name (it leaves a custom or
Tailscale domain alone):
mkdir -p ~/vaultwarden/backups && cd ~/vaultwarden
sudo tar -C ~/vaultwarden -xzf ~/vaultwarden-20261118-033012.tar.gz
sudo chown exedev: compose.yaml vaultwarden.env
sed -i "s|^DOMAIN=https://[a-z0-9-]*\.exe\.xyz$|DOMAIN=https://$(hostname).exe.xyz|" vaultwarden.env
docker compose up -d
until curl -fs localhost:8080/alive; do sleep 2; done; echo
Then do Put nginx in front and Set up nightly backups, open the vault as in Open the vault, and point your apps at the new address if it changed. Your accounts, items and organizations come back; the old admin password still works.
Update Vaultwarden
Read the release notes
for the new version, then, on the VM, back up, move the pinned tag, and
restart. Replace 1.37.6 with the version you want:
cd ~/vaultwarden
sudo ./backup.sh
sed -i 's|vaultwarden/server:.*|vaultwarden/server:1.37.6|' compose.yaml
docker compose pull
docker compose up -d
until curl -fs localhost:8080/alive; do sleep 2; done; echo
docker exec vaultwarden /vaultwarden --version
docker image prune -f
Also update the tag in the backup test's docker run line. New Bitwarden
app releases sometimes need a newer Vaultwarden, so if an app starts
failing after it updates, update the server first. To roll back,
restore the backup with the old tag: changing the tag alone
won't undo database changes.
Something not working?
On the VM:
cd ~/vaultwarden
docker compose ps
docker compose logs --tail=100
- An app or
bwsaysinvalid or missing authentication: that's exe.dev's login, not Vaultwarden: the VM is private. Runssh exe.dev share set-public my-vaultwarden, or use Tailscale. Registration not allowed or user already exists: signups are closed. Invite the address first, from the admin panel or an organization.- The admin page is a 404: you're on the public port. Use
https://my-vaultwarden.exe.xyz:8080/admin. - The admin password is refused: paste the password from
~/vaultwarden/admin-password, not the hash. After three quick wrong tries, wait five minutes. Too many login requests: the login rate limit; wait a minute.- A change to
vaultwarden.envdoes nothing: a setting saved in the admin panel wins. Change it there, or remove it fromdata/config.json, thendocker compose up -d. - Items don't appear live in the web vault: check the log for
Accepting Rocket WS connection. If it's missing, check nginx'sUpgradelines andsudo nginx -t. - Down after a reboot: run
sudo systemctl enable --now docker.service.
Frequently asked questions#
Is it safe to put my password manager on the internet?
It's a real trade-off. Bitwarden apps encrypt your vault on your device, so the server only stores ciphertext; a stolen copy is as strong as your master password. But a public server can be attacked directly, and a compromised one could serve a tampered web vault. Use a long master password, two-step login, and prompt updates; prefer the apps to the web vault; and if every device can run Tailscale, keep it off the internet.
Is Vaultwarden the same as Bitwarden?
No. It's an unofficial, community-built server that speaks Bitwarden's API, so Bitwarden's own apps work with it. It's small (about 10 MB of memory here) and includes organizations, attachments, Sends and two-step login. It isn't affiliated with Bitwarden, Inc.; don't take its issues to Bitwarden's support.
Can I keep the vault private behind exe.dev login and give the apps a token?
No. Bitwarden apps can't sign in to exe.dev, and they use the Authorization header for their own tokens, so a VM token can't ride along: we tried, and the CLI got 401s. Open the vault port, or use Tailscale.
Do I need an email server?
No. Without one, you invite people from the admin panel or an organization, and they sign up with the invited address. Add SMTP for emailed invitations, email two-step login and new-device alerts.
What happens if the VM is down?
Bitwarden apps keep an encrypted copy of the vault, so you can still unlock and read your passwords. You can't sync or save changes until it's back.
How much does it cost?
Vaultwarden is free and open source (AGPL-3.0), and all its features are included. You pay for your exe.dev plan. It uses very little memory and disk, but keep the VM for the vault alone.
Published Nov 19, 2026 · Updated Nov 18, 2026 · tested end to end Nov 18, 2026 · Markdown · manifest.json · Something wrong? Tell us